# Xol-metrix Assembly
This project assumes you know how to build the standard Xol Toolhead with this build assembly thrown into the mix.
| Notes | Image |
| -------------------- | -------------------- |
|Remove the support material in orange. They should break away with ease.|

 |
|Next drill out the 2 `Flanged M2` Heatset Inserts with a `5/64 inch drill bit`. Then use the `#2 center drill bit` to chamfer the top of one and the bottom of the other. ⚠⚠ **Make sure you thuroghly clean the inserts of brass when done!** ⚠⚠|
|
|Next drill out the 2 `Flanged M2` Heatset Inserts with a `5/64 inch drill bit`. Then use the `#2 center drill bit` to chamfer the top of one and the bottom of the other. ⚠⚠ **Make sure you thuroghly clean the inserts of brass when done!** ⚠⚠| |
|Insert the `Flanged M2` heatset with the **top chamfer** into the `extruder_adapter_bottom.stl` with the flang surface flush with the printed surface.|
|
|Insert the `Flanged M2` heatset with the **top chamfer** into the `extruder_adapter_bottom.stl` with the flang surface flush with the printed surface.| |
|Insert the `Flanged M2` heatset with the **bottom chamfer** into the `extruder_adapter_top_(your_choice_here).stl` with the flang surface flush with the printed surface.|
|
|Insert the `Flanged M2` heatset with the **bottom chamfer** into the `extruder_adapter_top_(your_choice_here).stl` with the flang surface flush with the printed surface.| |
|Next insert the 3 `M2x3.5x4 Heatsets` into the 3 holes in the `extruder_adapter_top_(your_choice_here).stl`.|
|
|Next insert the 3 `M2x3.5x4 Heatsets` into the 3 holes in the `extruder_adapter_top_(your_choice_here).stl`.| |
|Screw the `extruder_adapter_top_(your_choice_here).stl` and `extruder_adapter_bottom.stl` together with `M2x8 SHCS` ⚠Do not over tighten!⚠ |
|
|Screw the `extruder_adapter_top_(your_choice_here).stl` and `extruder_adapter_bottom.stl` together with `M2x8 SHCS` ⚠Do not over tighten!⚠ | |
|Clean the inside of the filament path with a `5/64 inch drill bit` it may have some ooze from istalling the Heatset inserts.|
|
|Clean the inside of the filament path with a `5/64 inch drill bit` it may have some ooze from istalling the Heatset inserts.| |
|Place the `5.5mm Ball Bearing` in the hole on top of the extruder adapter.|
|
|Place the `5.5mm Ball Bearing` in the hole on top of the extruder adapter.| |
|Put the `Omron D2F` (with no lever) into slot with clicker behind the Ball Bearing, secure with `M2x10 Self Tapping Screws`.|
|
|Put the `Omron D2F` (with no lever) into slot with clicker behind the Ball Bearing, secure with `M2x10 Self Tapping Screws`.| |
|Insert one `M2.5x3.5x4 Heatset` into the hotend mount (rest of hotend heatsets are not explained refer to Xol 2 Docs).|
|
|Insert one `M2.5x3.5x4 Heatset` into the hotend mount (rest of hotend heatsets are not explained refer to Xol 2 Docs).| |
|Install extruder adapter onto the `HE Mount` of your choice and install on your carriage of choice. (Tap option shown in picture)|
|
|Install extruder adapter onto the `HE Mount` of your choice and install on your carriage of choice. (Tap option shown in picture)| |
|Select the Blades of your choice `#4` (Yellow) or `OLFA KB4-F/5` (Green).|
|
|Select the Blades of your choice `#4` (Yellow) or `OLFA KB4-F/5` (Green).| |
|Use the Blade Jig that coresponds with your blade of choice #4 / OLFA and clamp the blade in it with the blade sticking in. **Final length should be ~20mm.**|
|
|Use the Blade Jig that coresponds with your blade of choice #4 / OLFA and clamp the blade in it with the blade sticking in. **Final length should be ~20mm.**| |
|Use the `blade_install_tool.stl` to install the blade. ⚠⚠ **Take extra precaution as the blades do not care and will go through your skin with no remorse and then the red sauce comes out!** ⚠⚠|
|
|Use the `blade_install_tool.stl` to install the blade. ⚠⚠ **Take extra precaution as the blades do not care and will go through your skin with no remorse and then the red sauce comes out!** ⚠⚠| |
|Insure that the blade is squared up with the `[b]_blade_holder_(your_choice_here).stl`. The hole on top is big enough for an `M3 Grub Screw` or you can glue the blade in.|
|
|Insure that the blade is squared up with the `[b]_blade_holder_(your_choice_here).stl`. The hole on top is big enough for an `M3 Grub Screw` or you can glue the blade in.| |
|Slide the Blade Holder into the Extruder adapter carefully aligning the blade into the slot.|
|
|Slide the Blade Holder into the Extruder adapter carefully aligning the blade into the slot.| |
|Install the Spring into the slot on the `[a]_cutter_arm.stl`.|
|
|Install the Spring into the slot on the `[a]_cutter_arm.stl`.|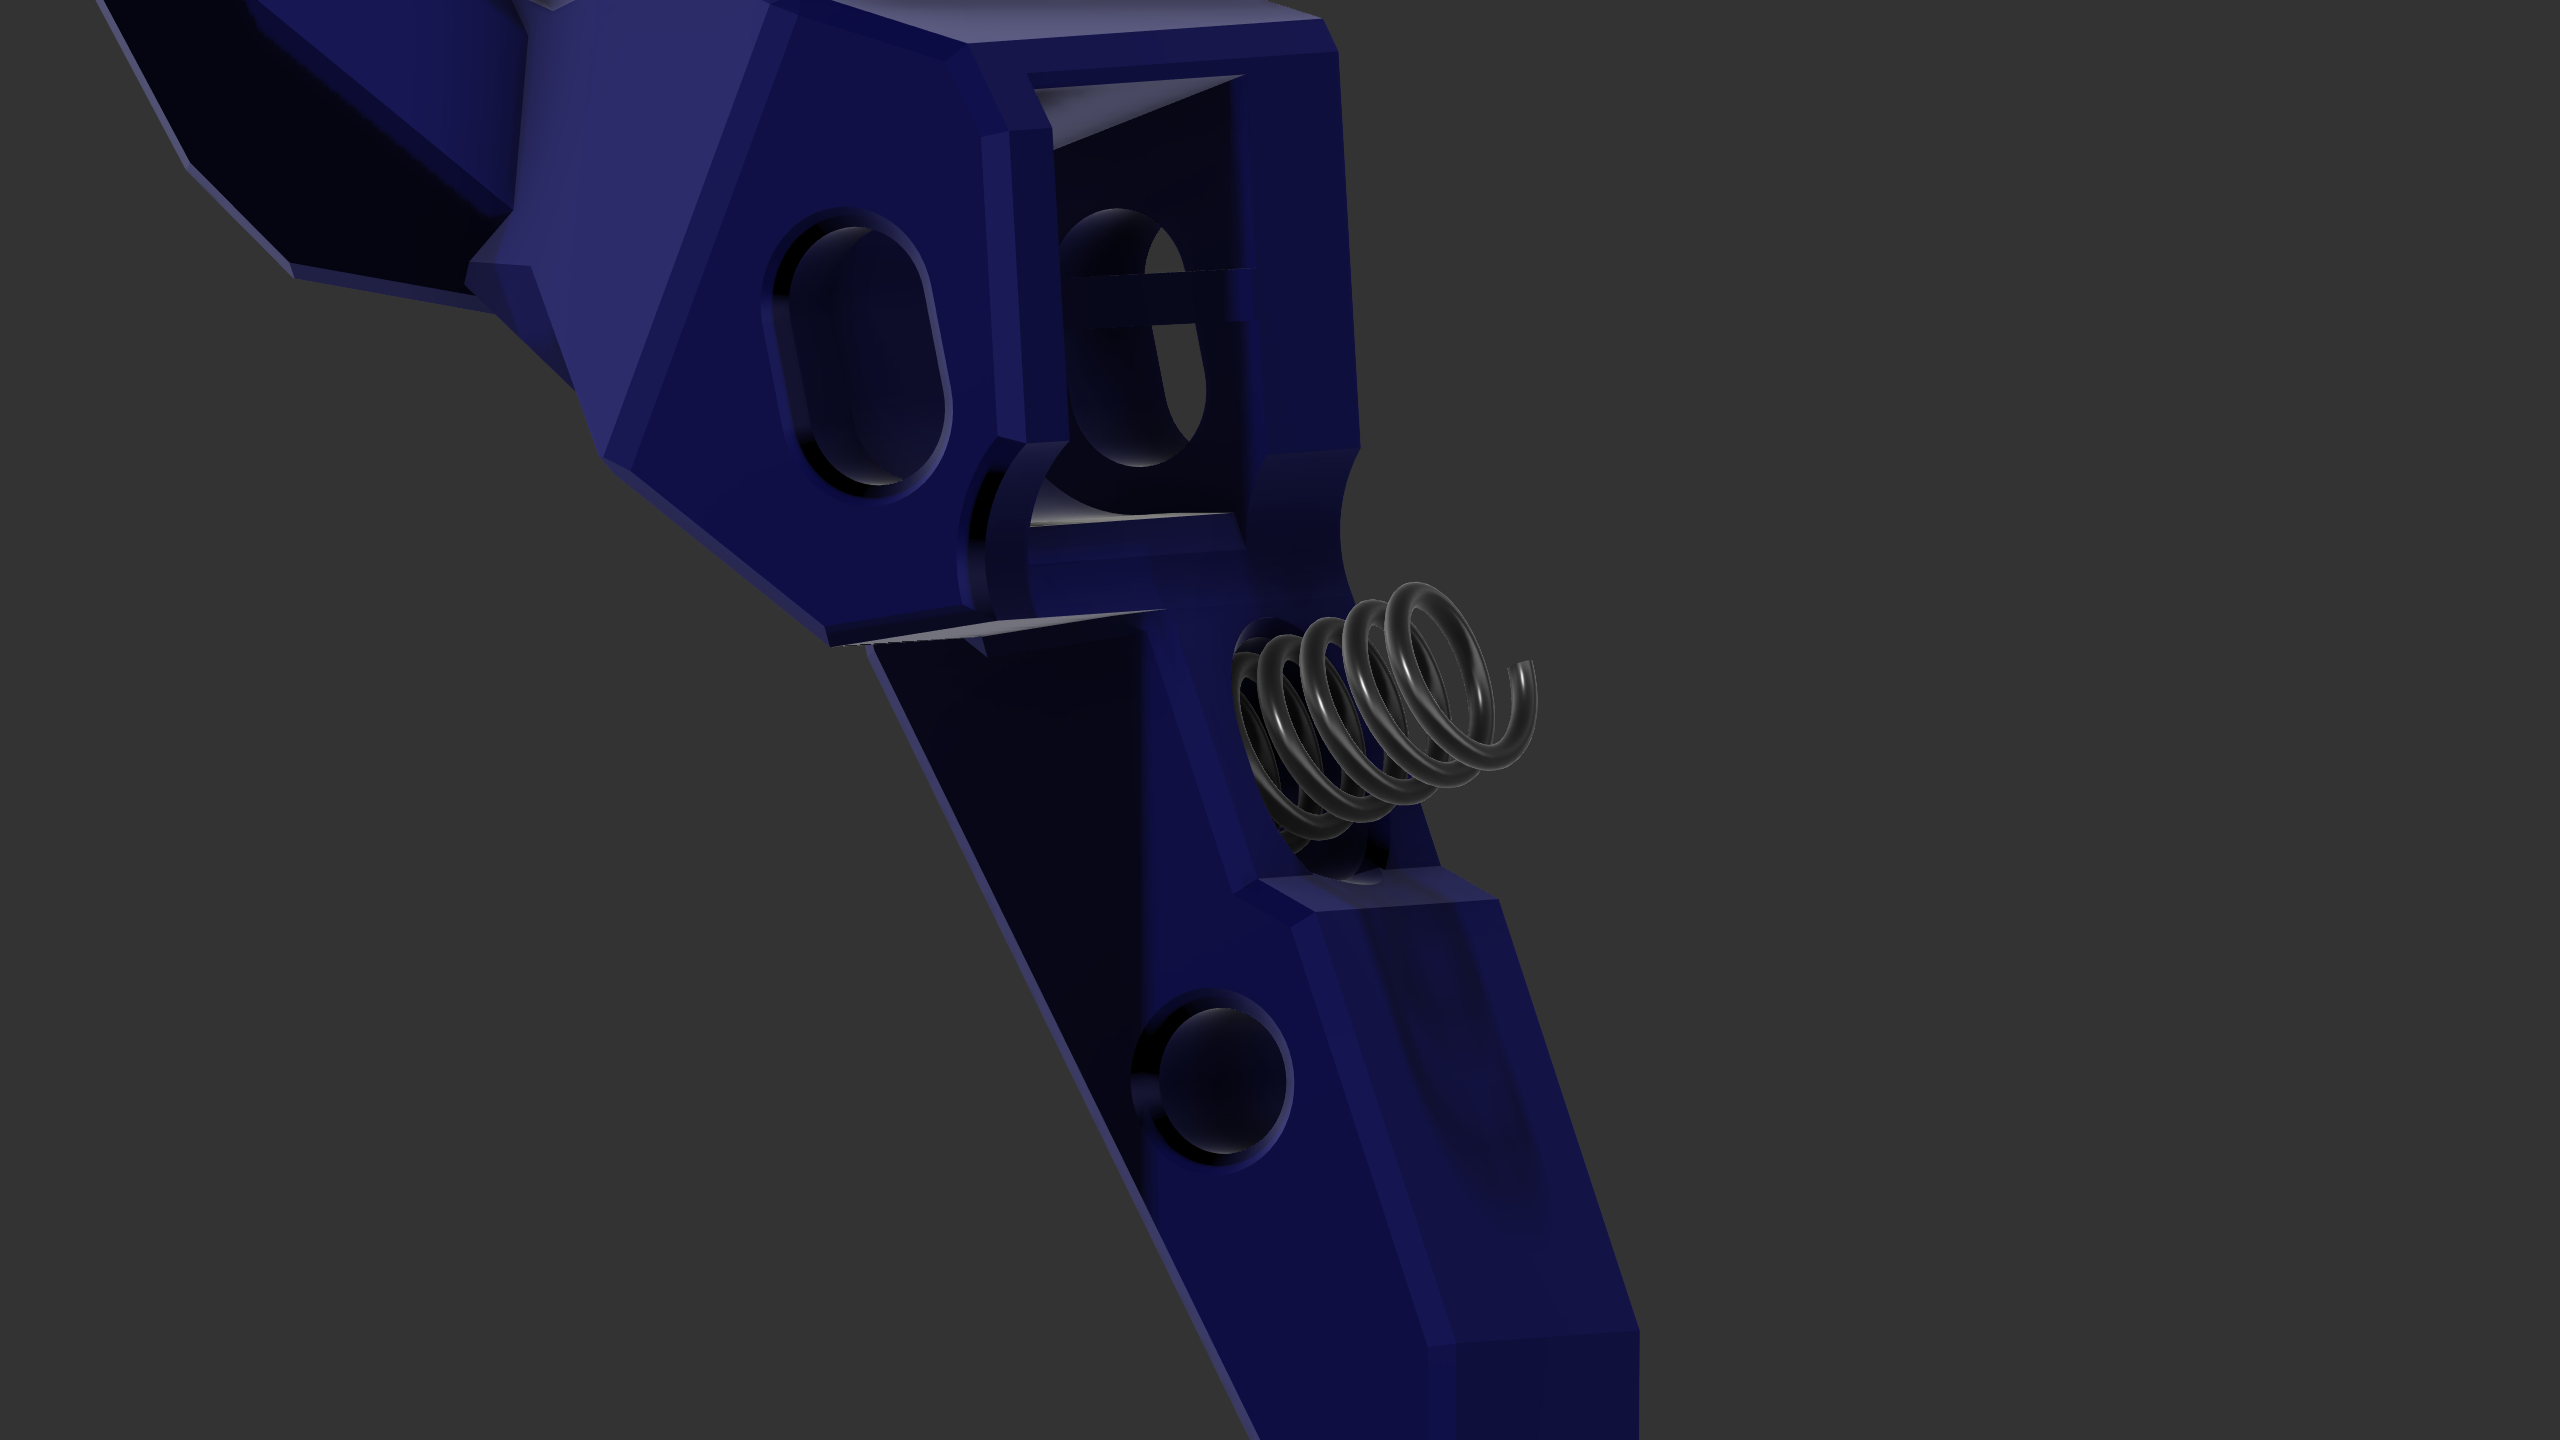 |
|Slide the cutter arm into the slot on the Hotend Frame partially **Do not kink the spring**.|
|
|Slide the cutter arm into the slot on the Hotend Frame partially **Do not kink the spring**.| |
|Use a small slim screwdriver of sorts to persuade the spring into the recess in the extruder mount while sliding the arm into its final position.|
|
|Use a small slim screwdriver of sorts to persuade the spring into the recess in the extruder mount while sliding the arm into its final position.| |
|Install the 2 `M2.5x15 SHCS` into the frame and blade holder to finish up the cutter install.|
|
|Install the 2 `M2.5x15 SHCS` into the frame and blade holder to finish up the cutter install.| |
|If using XolPAP Install the `M2.5x15 SHCS` on the back side of the arm shown here. (Thanks to scheini79 for the suggestion!)|
|
|If using XolPAP Install the `M2.5x15 SHCS` on the back side of the arm shown here. (Thanks to scheini79 for the suggestion!)| |
|After all this the rest of the Xol Toolhead will go together the same as the standard one.|
|
|After all this the rest of the Xol Toolhead will go together the same as the standard one.| |
|